How to setup Google Analytics for WordPress (Beginners Guide)
Google Analytics is a must have tool for any website, whether your site is for a small local business or a large eCommerce site, the insights gained is well worth the effort. In this short guide I will outline the steps to setting up Google Analytics for your site.
Note: This tutorial focuses on WordPress based sites, most CMS follow a similar process.
Prerequisite:
- Google email address / account
- Website
- (bonus) A good attitude ;)
Step 1 - Creating a Google Account:
Login with your Google Account : https://analytics.google.com/analytics/web/
Step 2 - Login into Google Analytics:
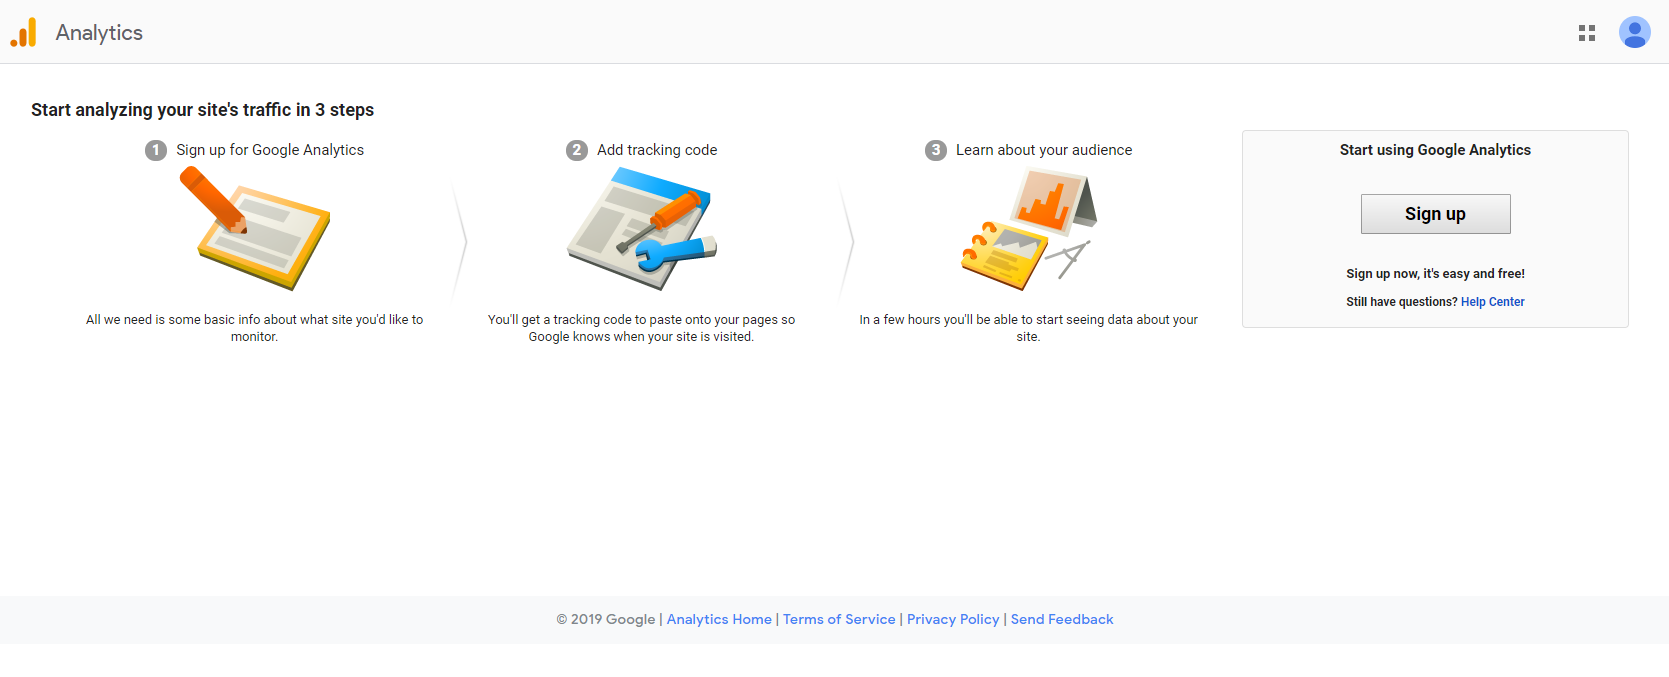
After login, you will be presented with the above landing page. This basically outlines the setups to setting up Google Analytics for your website. However don’t worry, this guide will be going into greater depth. Click the sign up button to continue.
Step 3 - Setting up a new account:
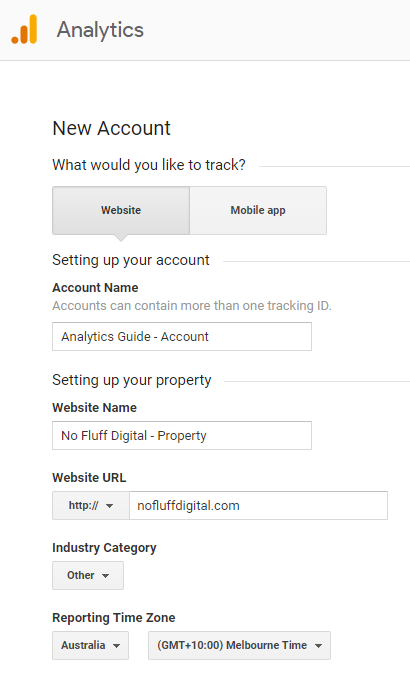
Once signed up, it time to setup the account details. You will notice that you have the option of tracking a Website Or Mobile app, in this guide we will be choosing the Website option. However Google Analytics can be setup on pretty much any device whether it be Website, Mobile app, Or even a point of sales machine (POS). Google Analytics can have multiple Accounts setup. These accounts can be setup by you or can be share to you by another Google account, this way multiple individuals can monitor the same sites. Without getting to advance, I will leave details of how many accounts you can have, and how many properties one account can have for a later guide.
Note: You don’t need to add ‘- Account’ or ‘- Property’ into the name, it’s just something I’m doing as an example.
Select your industry, and reporting time zone.
Step 4 - Data sharing settings:
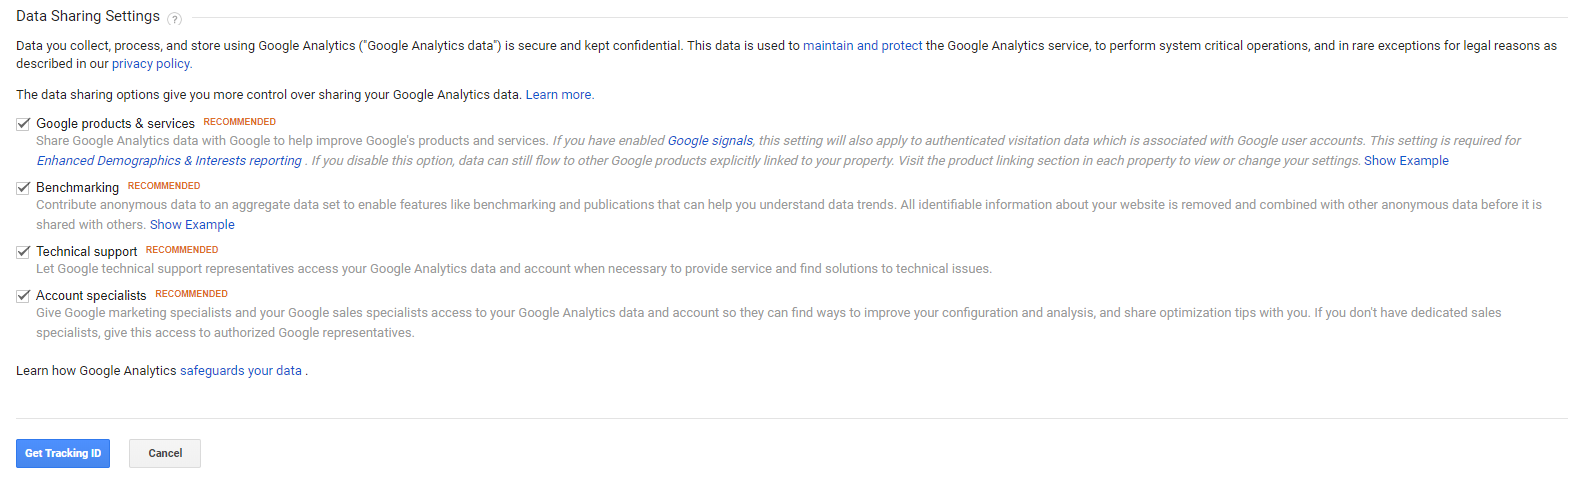
Google Analytics will ask you what data you would like to share with them. This is optional and entirely up to you.
Step 5 - Terms of service agreement:
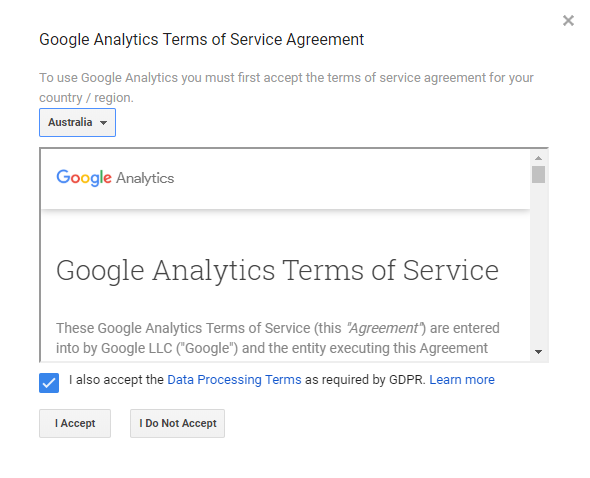
Accepting the terms and conditions, make sure to select the correct region.
Step 6 - Google Analytics tracking id:
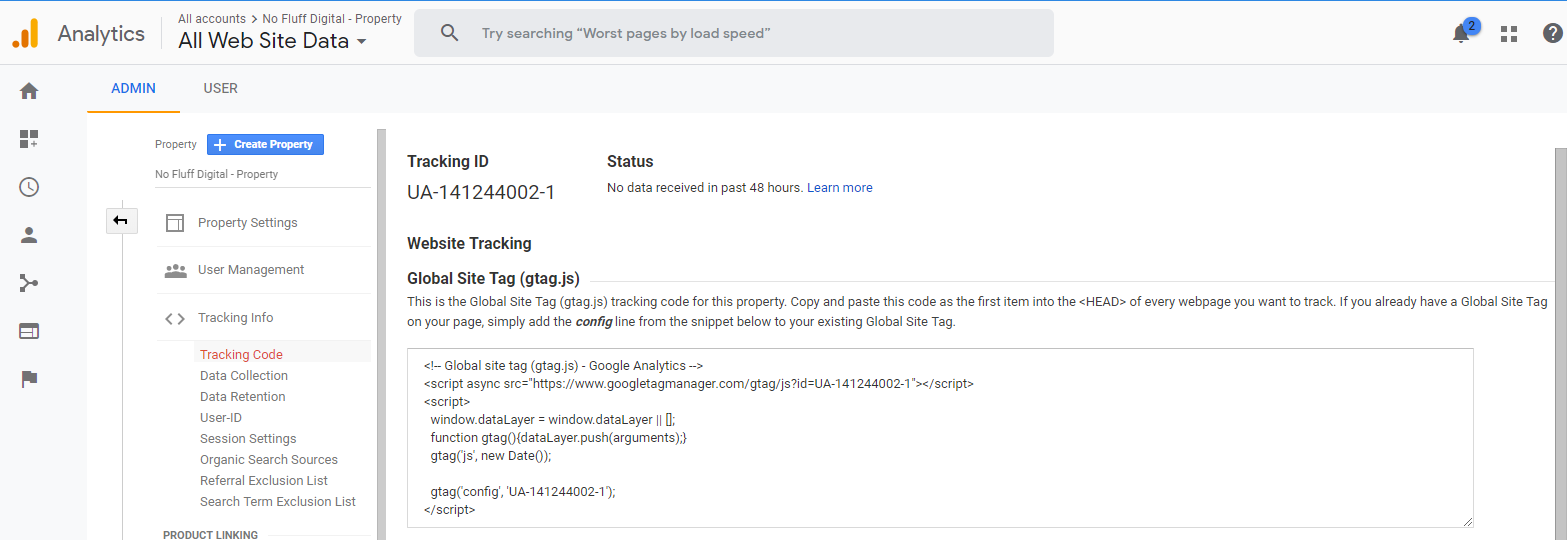
Now that the account and property is setup, its time to setup the tracking on the backend. Above you will notice an area with a html snippet inside it. This is the tag we will be placing on our site. Above you will also notice the tracking ID for our property, make sure when copying the snippet into your website, that the tracking ID is the same as the one on the second last line of the html snippet (Don’t use mine).
Step 7 - WordPress Theme:
Adding the html snippet with the tracking ID can be done numerous ways, especially with content management systems like WordPress. However, personally I prefer to add the snippet straight into the theme’s header file. The reason for adding it directly into the header file is that it’s hard for anyone to delete it after the fact. For instance using a plugin to add the tracking ID to the website, leaves your site vulnerable to the plugin being removed or updated and accidentally deleted (This has happened to many websites causing a loss in valuable data).
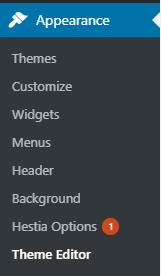
Once in WordPress, navigate to Dashboard>Appearance>Theme Editor. Here is where all your themes files lie, so be careful what you edit!
Step 8 - WordPress header.php:
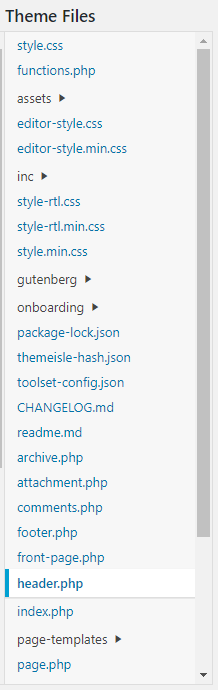
On the right hand side you will see Theme Files, scroll down until you find header.php.
Note: If you cannot file these files, you may not have sufficient user permissions to access these files, in this case you will have to contact your webmaster.
Step 9 - Tag implementation:
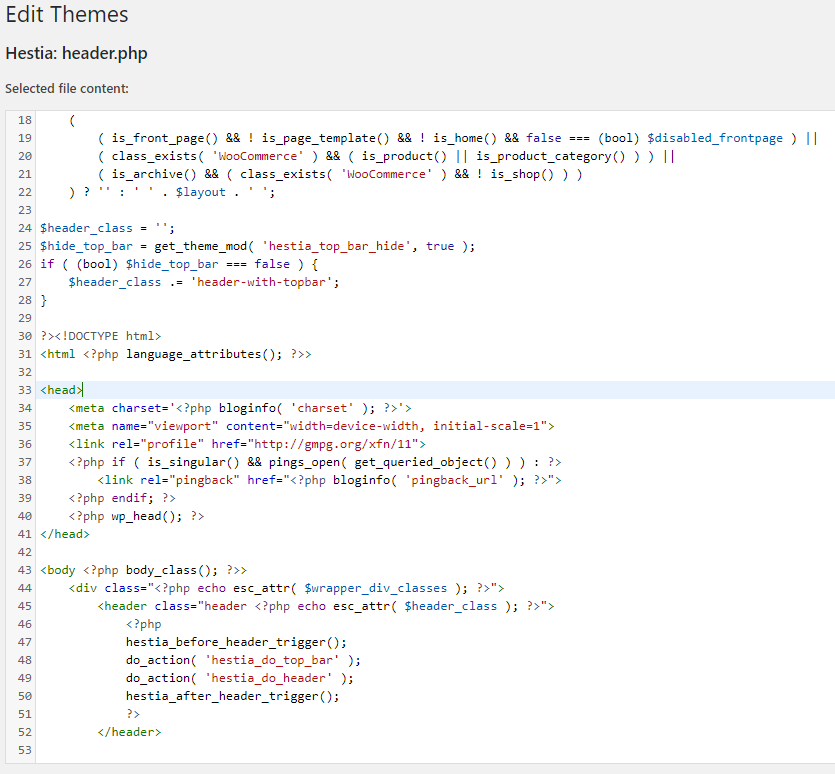
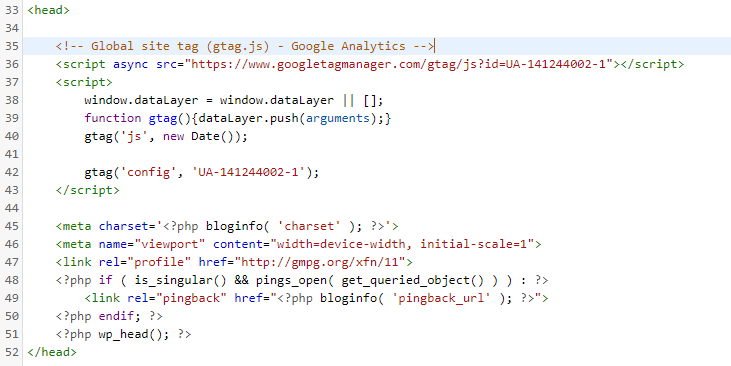
Above is a example of our current theme header file. Yours will look similar, possibly with a few more lines of code (Depending on the theme).

Going back to the Google Analytics tag page, you will see that Google Analytics requires the tag to be the first item within thetag. Below is an example of the Google Analytics tag within thetag:
Once you have added the tag, go ahead and update the file.

Step 10 - Tag testing:
If you have made it this far congratulations! Now, to make sure we have install the tag correctly, we can test it via a Google Chrome Plugin: Tag Assistant (by Google)
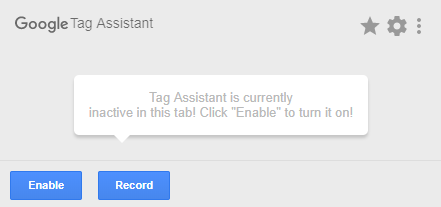
Once installed, go ahead and open the plugin. If this is your first time using this plugin, you will see an option to enable. Once enabled simply refresh the browsers, and open the plugin. You should be greeted by a screen similar to this one:
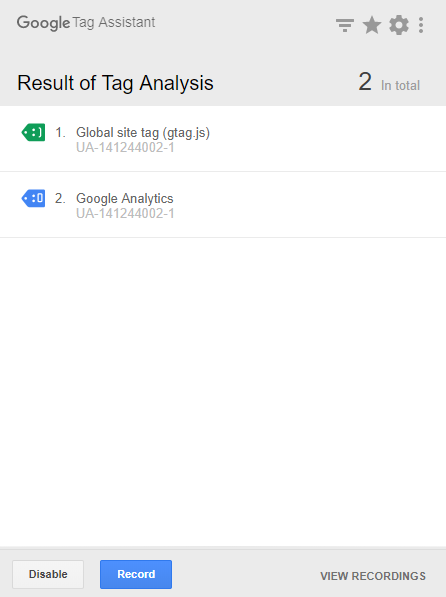
You will see two tags were fired when the page was refreshed. The first one was the general site tag (Global site tag), and the other one will be an event - which will be pageview. The important thing to note is that there are no red tags or errors displayed.
Step 11 - Google Analytics real time report:
Now that you have confirmed that the tag is properly implemented, its time to check out your first activity on Google Analytics!
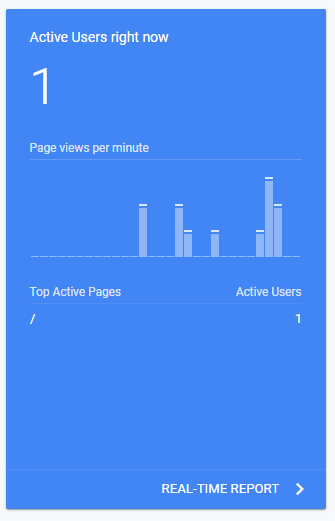
If you are currently on your homepage you should see at least one active page being ‘/‘.
This concludes our guide on setting up Google Analytics for the first time. The purpose of this guide was to get your hands dirty. In saying that this method is relatively out dated due to Google Tag Manager (Guide coming soon) which is a more advanced method of tracking your website.
Watch out for more guides like this one, also if you liked this guide please feel free to share it!